The boat is now hauled clear of the tide and pulled half way into the shed. At this stage we do a pressure wash on the outside. Normally this is to remove weed and barnacles but this time it’s Loose paint. She looks a bit sad as she rolls up the slip.
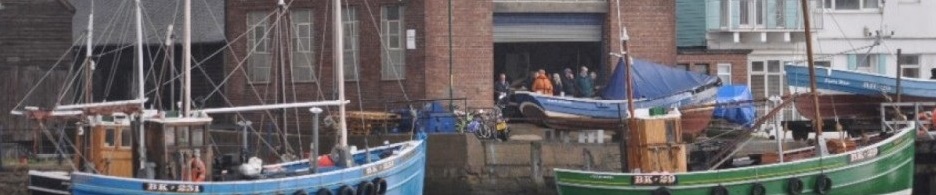
Mick had started to burn off the paint but only got about 8 feet each Side this resulted in some confusion as he stopped in the middle of the name and the port side read as “eggy” and the starboard side was “Pegg”. Another short haul and its into position to lock off the cradle and slack back on the winch wire.
Next day we remove all the inside gear and loose fittings then remove all the floors. Now it’s bucket and scraper time, this time its not at all to bad, because she ain’t been Fishing or potting. Usually its rather messy and rather aromatic Occasionally some are that niffy you have to use a gallon of good old Jeyes fluid or a dust mask with a shot of Dettol on the Front. Most fisherman only look under the floor when something’s wrong or for something not to be seen by the Bailiffs but very tasty with claws.
Time for the inside to be pressure washed, I have a very good machine and this removes most of the loose Paint as well as the rubbish. Finish the blast then pump out the boat as best we can, then the next day dry out then remove loose material.

Page 5.
It’s a waste of time, she’s to far gone, its a wreck she can not be fixed, is the owner from “Cherry Knowles” our local mental hospital. Mick has to take it all, but I tell him I’ve done it all before and heard it all before so sit back watch the transformation and in the end watch them eat words!
Now the challenge starts, taking off some plywood patches on the keel section forward, we discover a terrible attempt at repair. This involves a short piece of timber fit right through the keel, with no bolts in, held in only by the ply wood. After we remove the keel repair we discover that this was only the Beginning as the deadwood was very soft. The attempt at repair was only making things worse as the keel section forward of this was a bit worn. The decision to replace the forward Section was taken.
Keel Section Repair -No bolts, just tapped out

Page 6.
Repair to forward Deadwood and Keel Section.
When a replacement of a deadwood is required, you can reduce the fitting time and make the fit more precise by biting the bullet and removing planking on the keel strake and no. 2 plank. I remove about 4 feet of the 2nd strake then about 5 feet of the keel strake, with the no 2 plank removed, the access to the nails and fixings in the keel strake is greatly improved.
Once both planks are off we get a true picture as to the condition of the deadwood. Things are not looking good the forward section is rotten and the “Golden rule in boat restoration – if rots about get it out” this can only cause problems in the future, the big decision how far, Mick decides take out the full stem and apron.
With a new coble the stem and apron are in one section of timber but with a repair its easier to fit these in 2 sections and bolt through a much stronger job as you can avoid short grains on timber ends.

Page 7.
Making the Templates.
When making up templates its worth spending the time to get a good fit, as trimming off 1/2 inch softwood is much easier than taking down 3 inch oak.
Make up your template, keeping in mind the position of the scarf joints and position of bolts, a quick tip is to mark out in chalk first until you’re happy with position, then make up in timber. Try to make up as many of the templates as you can. With all the templates made you can place them on the log and judge the cutting out. The advantage of this is, the saving of timber and avoiding short grains. These templates are not the ultimate size if you need to move the scarf a few inches to get it out, do so, it can be allowed on the next template.
When you cut out the sections sometimes it’s not possible to get the saw to exit the timber. A good tip is to bore a 1 inch hole in the waste wood this allows you to turn the log on the table and change the direction of the blade safely. The more holes the better but remember you could use some of the offcuts.
During the cutting out, keep as close as you can to the fit line but leave some on the waste side as during the cutting out the log can de-stress and change shape slightly so you might need to make a second cut on the fit line.

Page 8.